The author interface is a web-based interface that allows you to manage your book on Runestone Academy. It is designed to be easy to use and provides a number of features to help you manage your book.
When moving your book to Runestone Academy we will clone your repository to our server. We do this one time, after that we use git pull to get the latest changes from your repository. This means that you can make changes to your book on your local machine and push them to GitHub, then use the author interface to pull those changes into Runestone Academy and rebuild your book. Ideally your document-id and the name of your repository are the same.
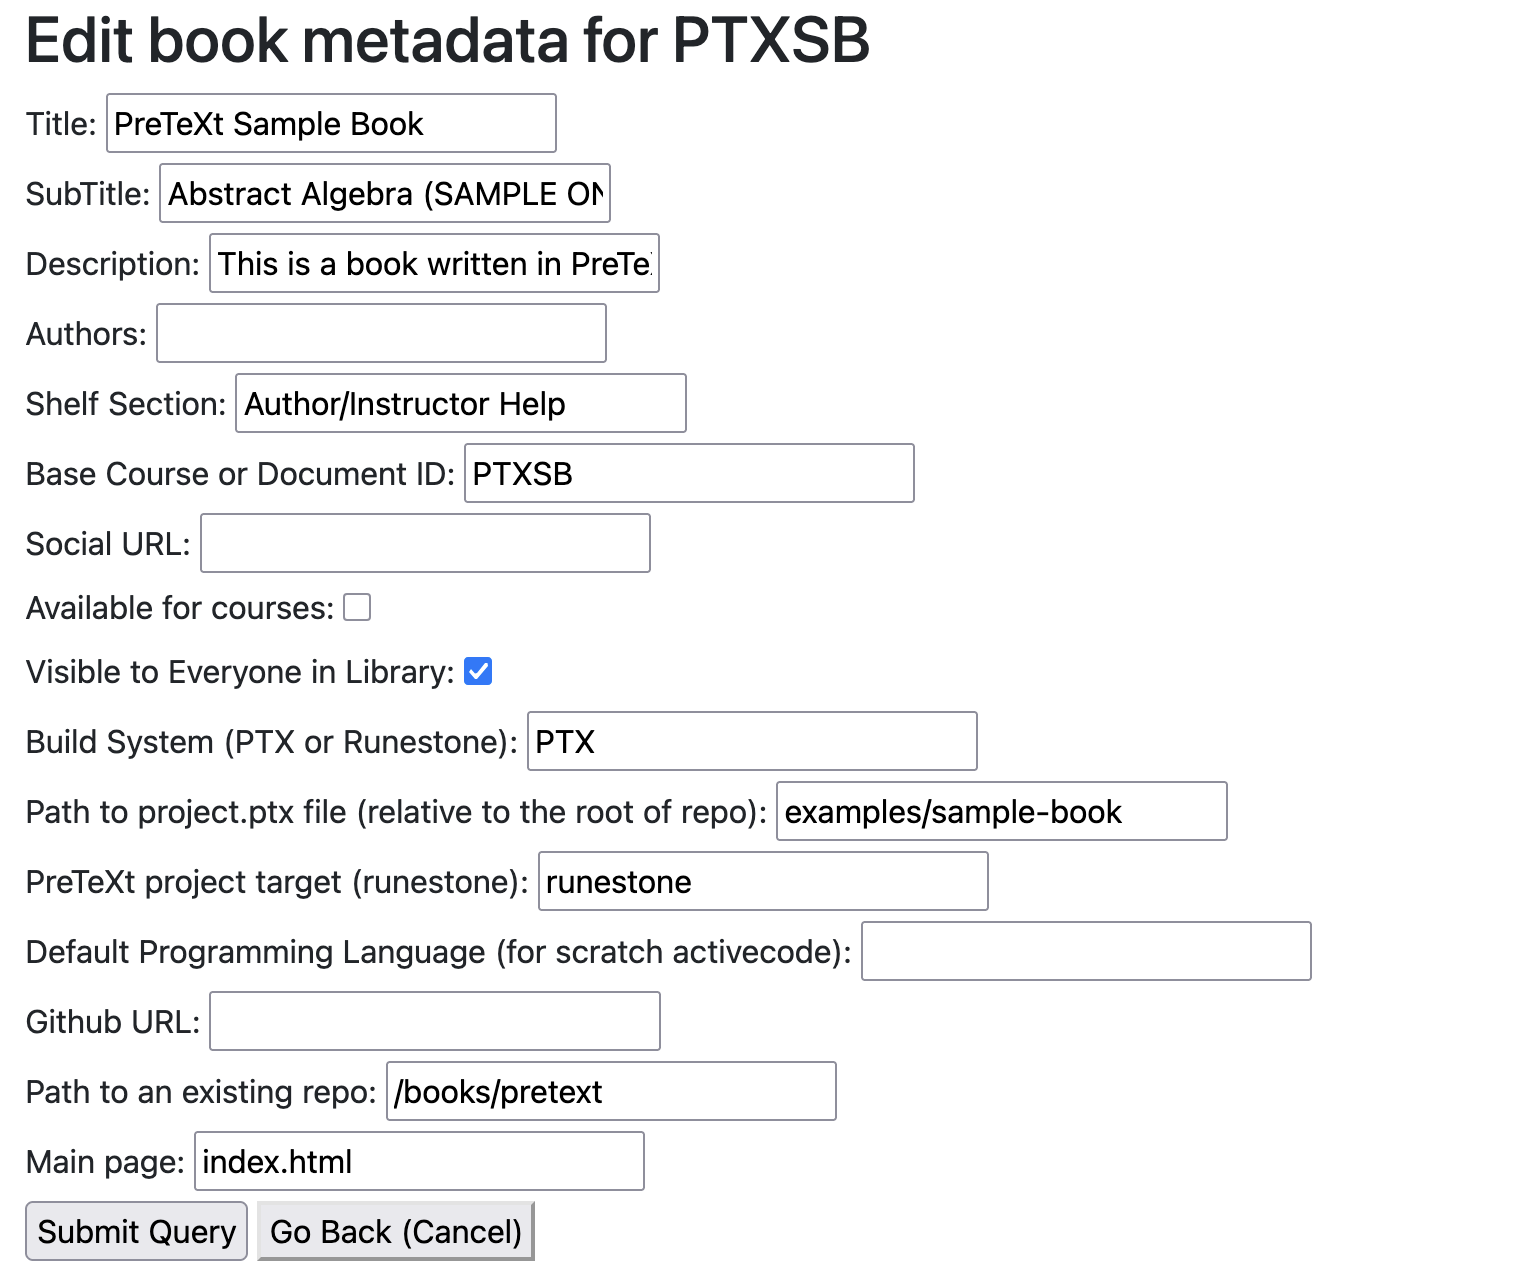
If your document-id and repository name do not match, then you will need to update the “Path to existing repo” in the author interface metadata before you build your book. This should not be a GitHub URL, it is just the name of your GitHub repository (see Figure 32.3.4).
If your book has already been cloned on Runestone, then you cannot clone it again. If you think you have a use case where this is absolutely necessary please reach out to someone on the team to talk about it.
The author interface is available at author.runestone.academy/author. You can log in with your Runestone account. Once you have logged in you will see a list of your books. You can click on the book title to to edit metadata about your book. The author interface is also where you can build a new version of your book, see some analytics about your book, and publish your book to the Runestone Academy servers. You can even get an anonymized data set from a large sample of the classes using your book.
The main page of the author interface gives you access to all of the different functions. Clicking on the build button pulls the latest source from GitHub and builds your book. If you have a large book this can take a few minutes. When the build is complete you deploy your book to the runestone servers. You will see the build status change at the bottom of the page. If there is a failure for any reason you can usually see the cause by clicking the button to view the latest log.
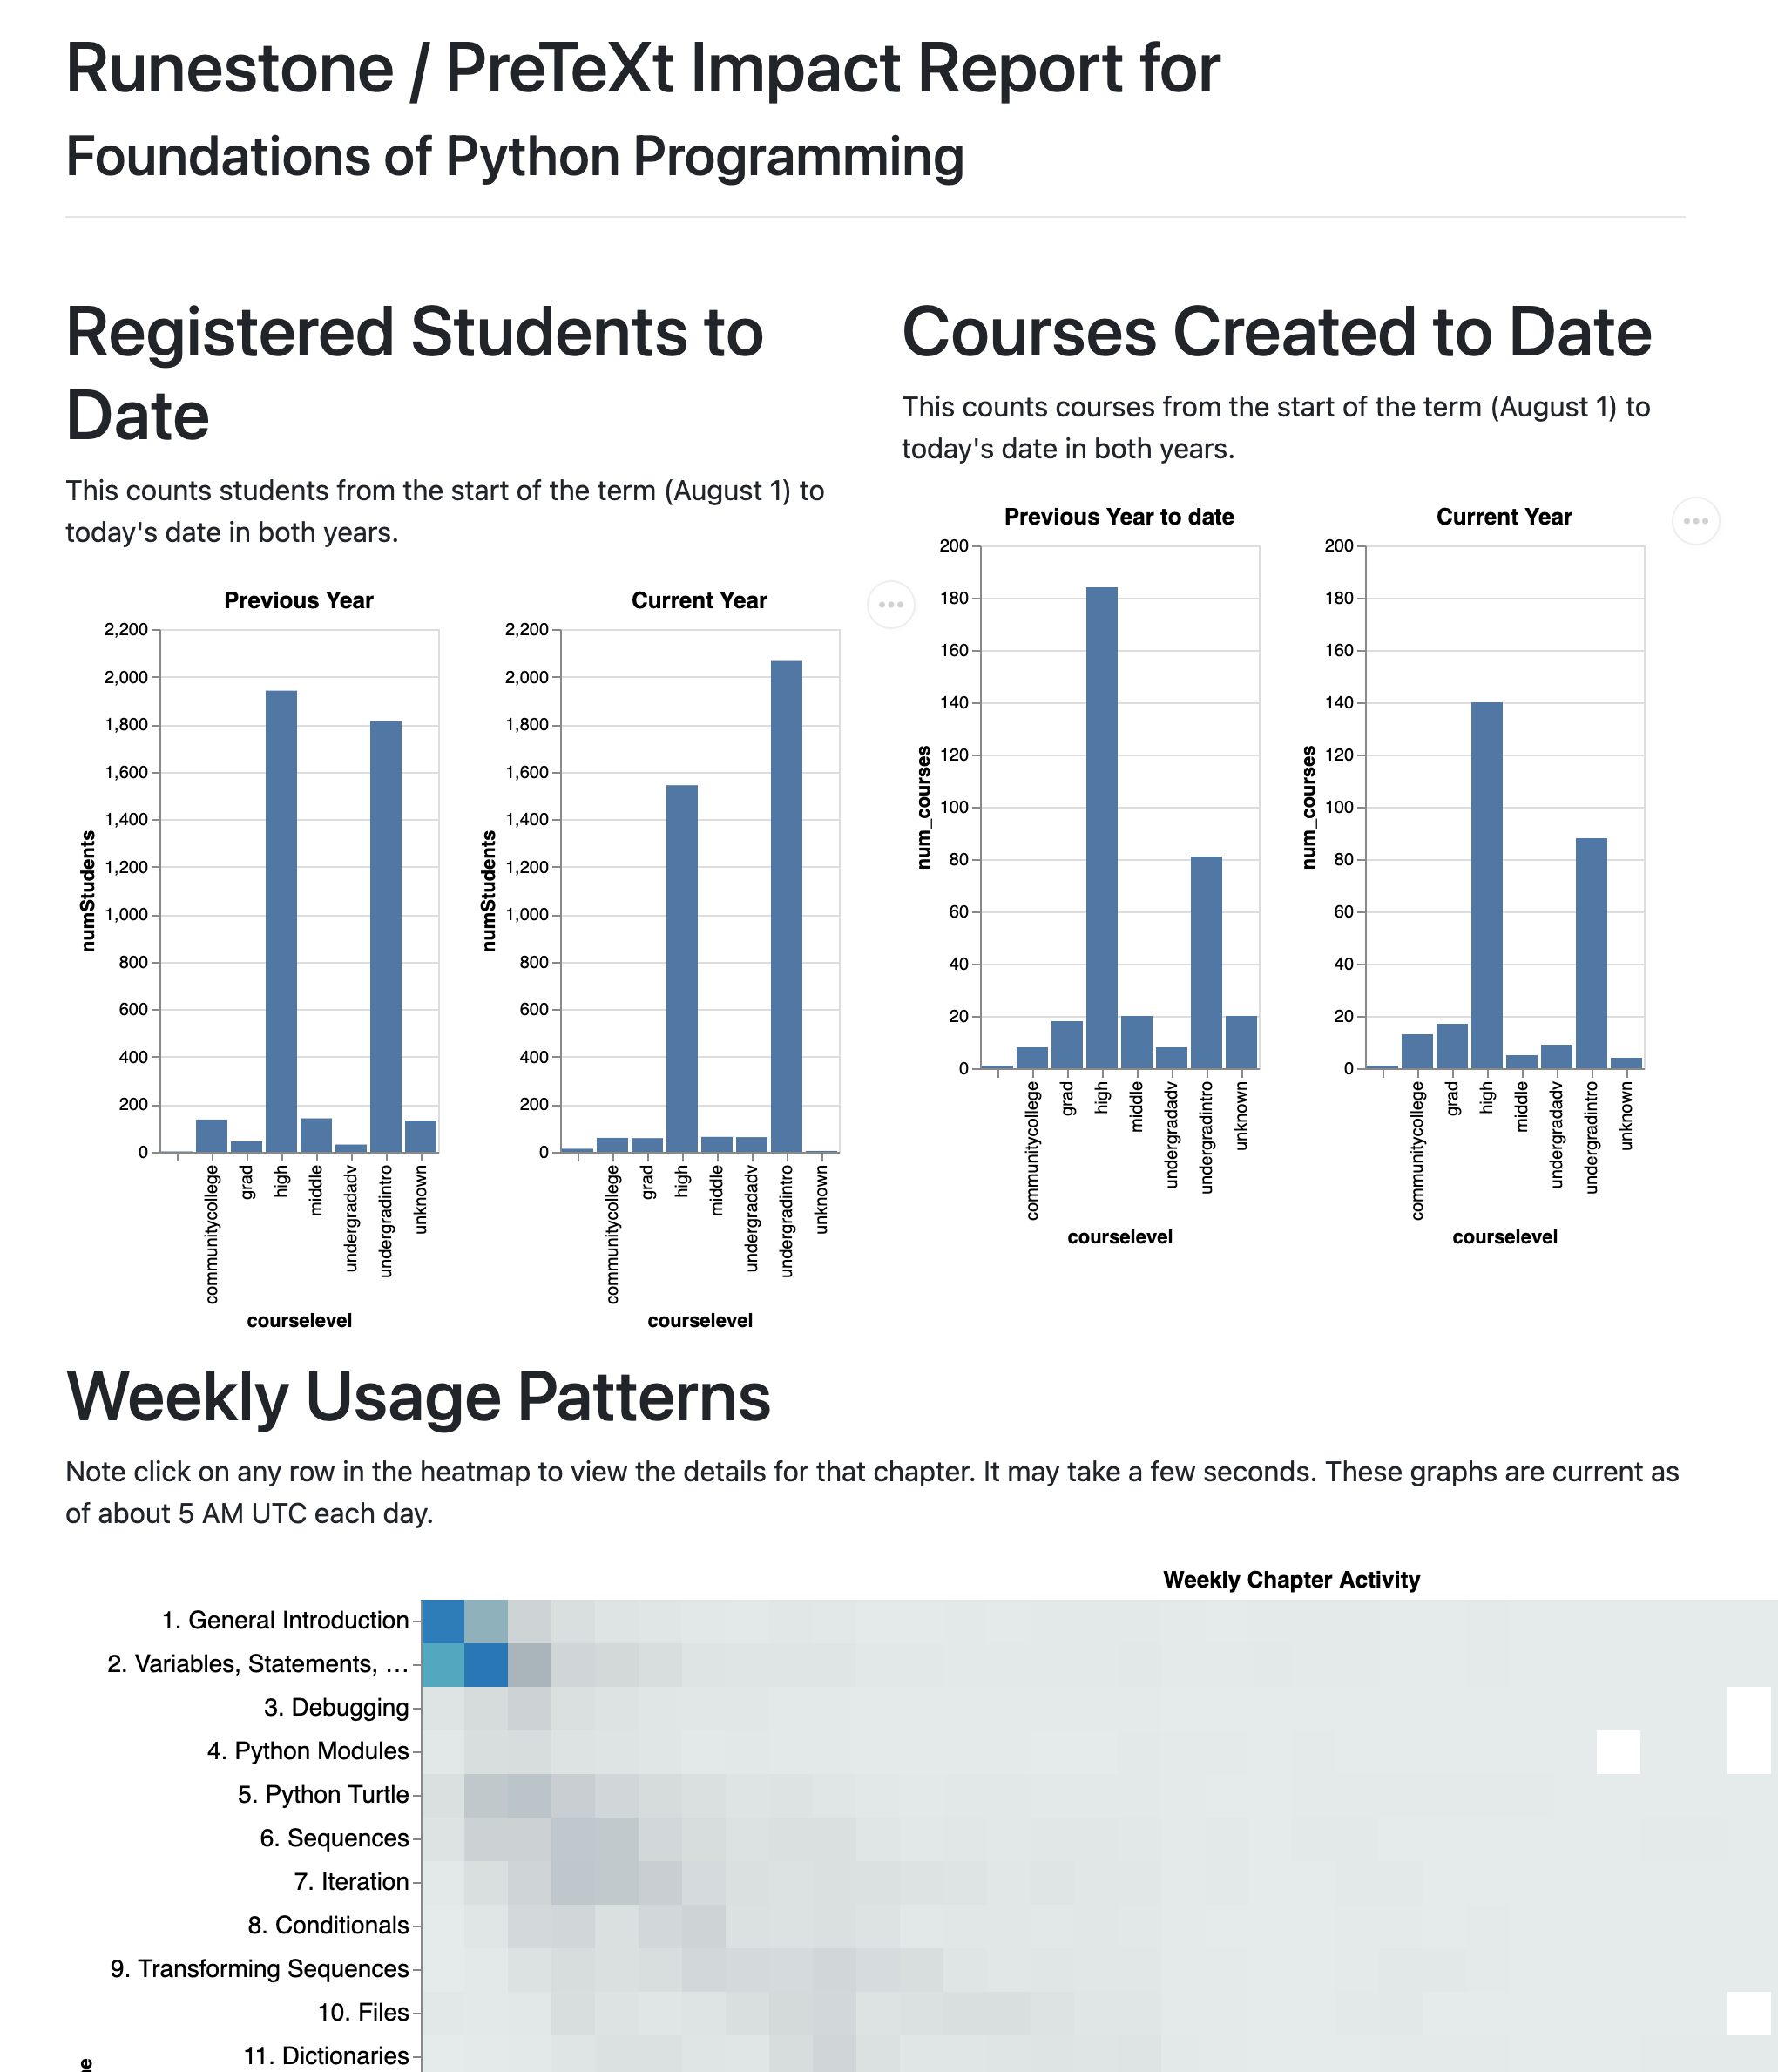
Another feature of the author interface is to provide you with some analytics. This page shows you the number of students that have enrolled in a course using your book year to date. It also shows you usage patterns for the book by the week of the course. You can click on any of the shaded cells to drill down and see how students are viewing the sections of each chapter.
If you click on the book’s identifier you will be able to edit metadata about the book. This is reflected in our library page so you can change the shelf section or update the blurb that describes your book to an audience. The Available for courses and Visible to Everyone in the Library checkboxes allow you to control the visibility of your book. If you are in the early stages of development you probably do not want others to see the book, but you can always view it via a direct link. When you are ready to make your book available to the world you can check the Visible to Everyone box and your book will appear in the Runestone Library. When you are ready to let others create a course around your book you can check the Available for Courses box. This will allow others to create a course using your book as the textbook. You can always change these settings later.
If your repository name and your document-id do not match you will need to fill out the the “path to an existing repository” field so that it matches what you checked out from GitHub.
If your repository is structured so that your project.ptx file is not in the root of your repository you will need to configure the path to the project.ptx file. This is done by filling in the field for the path to the project.ptx file. This should be a relative path from the root of your repository to the project.ptx file.
To create book number 2 on the main author page use the “path to an existing repository” field. This should be /books/<your-repo-name>. Leave the GitHub URL field blank.
Depending on how your repository is structured you may need to make sure you have a second target for the second book with a different output folder configured and a different document-id. Alternatively you may have an entirely separate project.ptx file for the second book in a different folder of your repository. In this case you need to fill in the field for the path to the project.ptx file.
If you have a single repository and want to build two books using different versions then the process is the same as above, but you will need to have a second publisher file with the appropriate version information so that you will get a different output. This includes using the @component on the <document-id> element. This will allow you to have two different books in the same repository with different document-ids.