Section L.1 Software prerequisites
We begin with the programs you will want to have installed prior to using the PreTeXt-CLI. All software can be downloaded free of charge, and is relatively easy to install.
Subsection L.1.1 VSCode
VSCode is short for Visual Studio Code. This is a text editor developed by Microsoft; we recommend it not because it plays well with Windows (although it does), but because of the availability of the
pretext-tools add-on, which will let you run the PreTeXt-CLI without leaving the editor.
To install, the editor, first download the installer from the VSCode website.
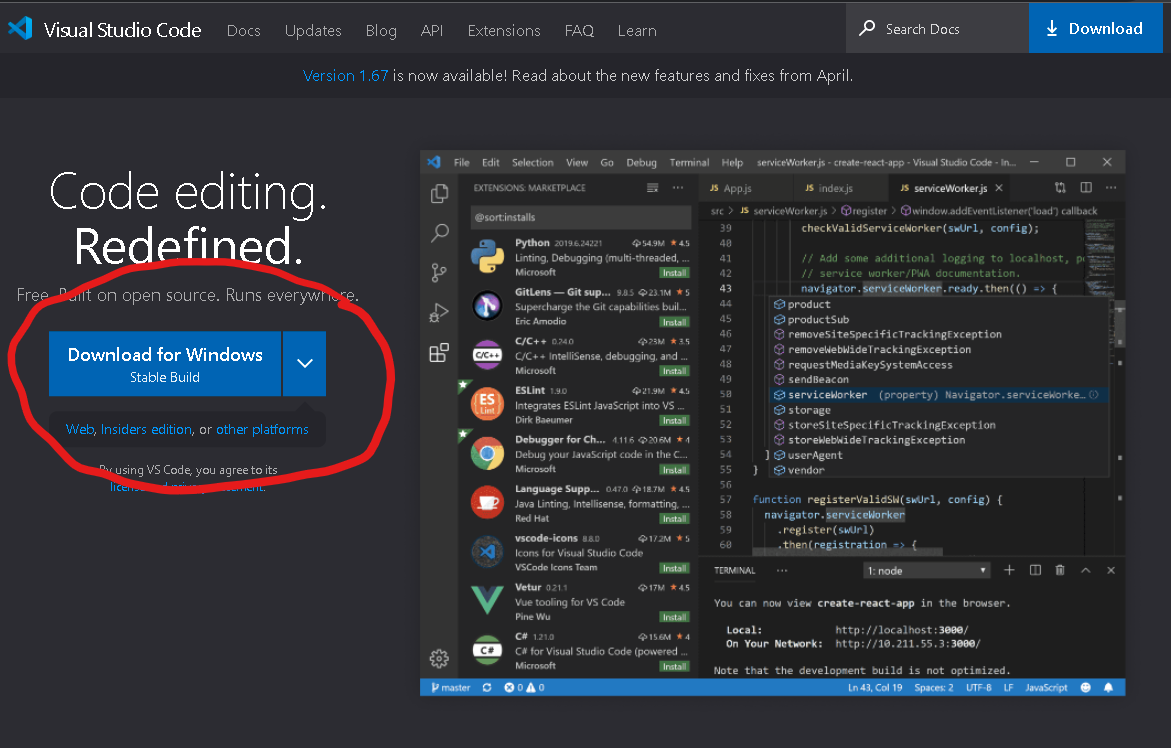
Screenshot of the VSCode website, showing where to click to download the installer
When running the installer, be sure that the “Add to PATH” option is selected:
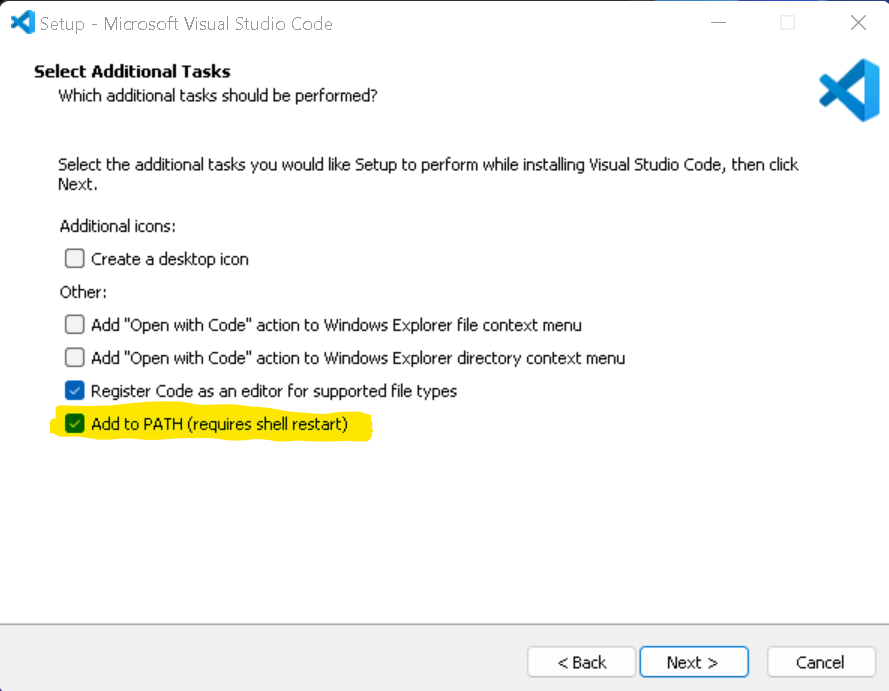
Screenshot of the VSCode installer program, showing where to click to ensure the program is added to the Windows system environment variables
You should now have VSCode installed on your system.
Subsection L.1.2 Python
One difficulty with using PreTeXt on Windows is the fact that Python is not core software, and there are many different ways to install install. The recommended method for installing Python is to get it directly from
python.org. Other Python installations, such as Anaconda, or even Miniconda, include a lot of extras that we don’t need.
To install Python, simply download the installer from the Python website.
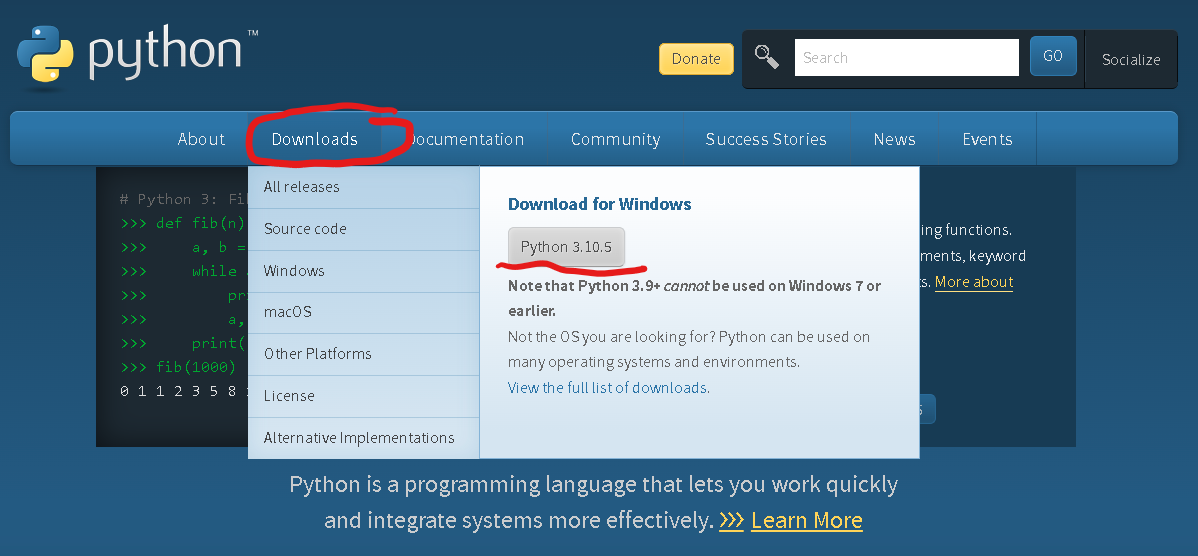
Screenshot of the python.org webpage, showing where to access the installer download
When you run the installer, be sure to check off the box to add Python to the Windows PATH during installation. This will ensure that Python commands can be run from the command line without needing to provide the path to the Python program.
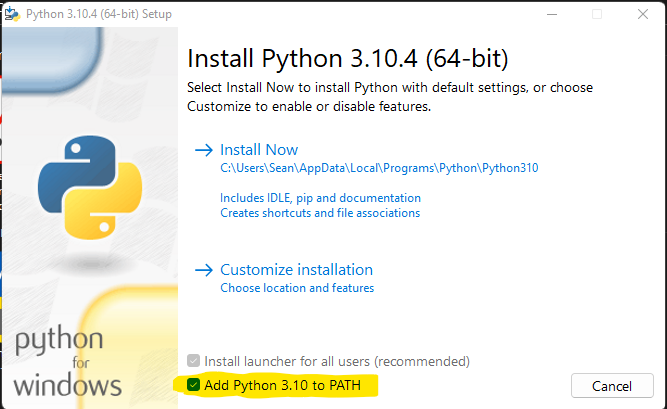
Screenshot of the Python installer program, showing the box that needs to be checked to ensure it is added to the system environment variables
Subsection L.1.3 Git for Windows
The next piece of software we need to install is Git for Windows. This will provide tools for allowing us to interact with textbook source on GitHub. More importantly, it provides us with the Git Bash terminal, which is what we will be running all of the commands for PreTeXt.
You can get Git for Windows at
gitforwindows.org.
The installation process for Git for Windows can seem quite complicated, as there are a lot of options, and many of them are quite technical. You can safely choose the defaults throughout, unless there is a particular setting you’re familiar with that you wish to change. The only thing you might want to do is change the default editor. Since we have already installed VSCode, we can choose to use that instead of an editor like Emacs or Nano that you may be unfamiliar with.
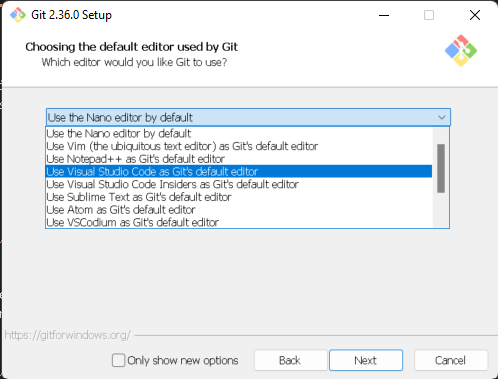
Screenshot of the Git for Windows installation program, showing how to select VSCode as the default text editor
Subsection L.1.4 Other software
A number of additional programs may be needed to assist in processing your book, depending on what elements your book contains.
- LaTeX
-
You will almost certainly need to be able to process LaTeX, either to produce the PDF version of your book, or to process LaTeX images for the HTML version of your book.There are two ways to install LaTeX on Windows: MikTeX, or TeXLive. Although TeXLive is the default LaTeX distribution for Linux and MacOS platforms, most Windows users find MikTeX easier to use, since it comes with package management software to assist with automatically installing needed LaTeX packages. One thing to keep in mind: with MikTeX, you must run an initial update from the MikTeX package manager before it will work correctly.
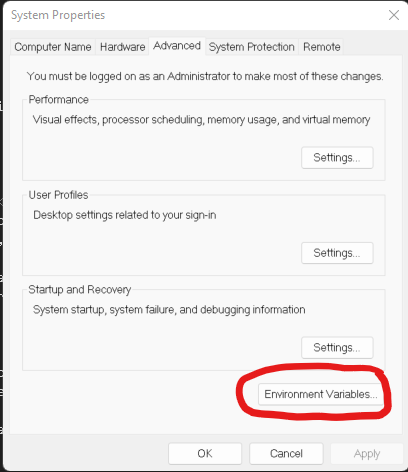
Screenshot of the Windows system property control panel, showing how to access the Environment Variables
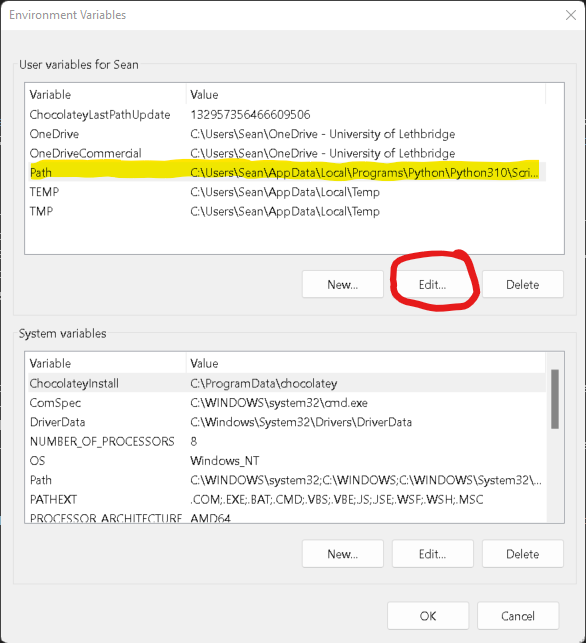
Screenshot of the Environment Variables control panel, showing how to access and edit the Path
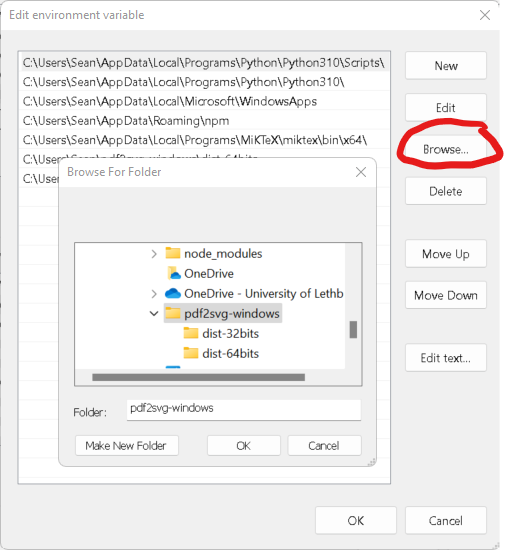
Screenshot of the interface for editing the Windows Path to add a new program
- Sage
-
If your book includes Sage components, such as
sageplot(but not Sage Cells), you will need to install Sage to process them. Sage is available atwww.sagemath.org. Click on the download button, and follow the instructions in the installer. - GitHub Desktop
-
If you find it difficult to manage git from the command line, GitHub provides a graphical user interface for the Windows environment, called GitHub Desktop. This provides a point-and-click interface for synchronizing your local changes with GitHub.
